The Yellow Rainbow Socks are the fourth post in the Rainbow Sock Collection Series that began with ‘What is the Perfect Basic Sock Pattern?’
During early summer when I discovered I needed some new hand knit socks I thought of just casting on for a new pair using one of the basic patterns that I knit regularly. But then I began thinking about which of the socks I have made that felt most comfortable when I was wearing them. This lead to a scribbled out table in my journal in which I started writing different heel and toe combinations. When I had reached 7 I decided on a rainbow theme. What can I say, I really love a nice colour theme!
Design Choices
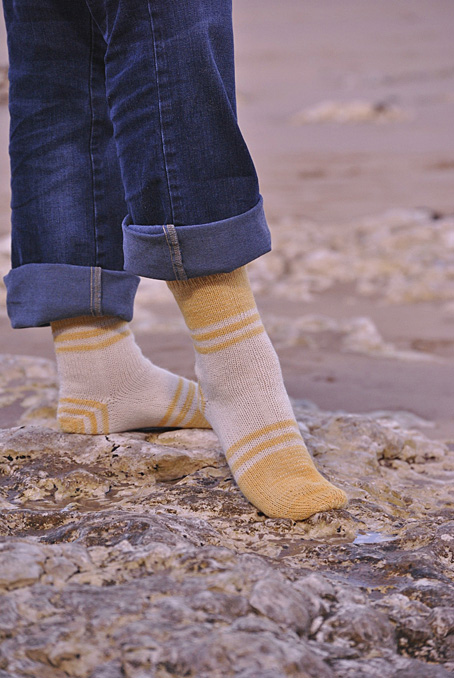
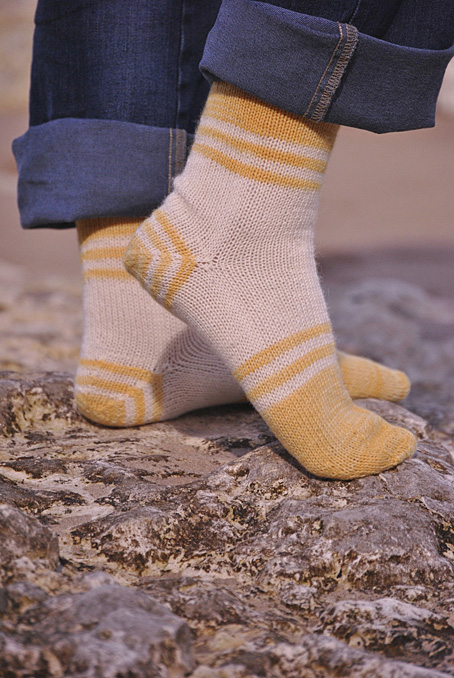
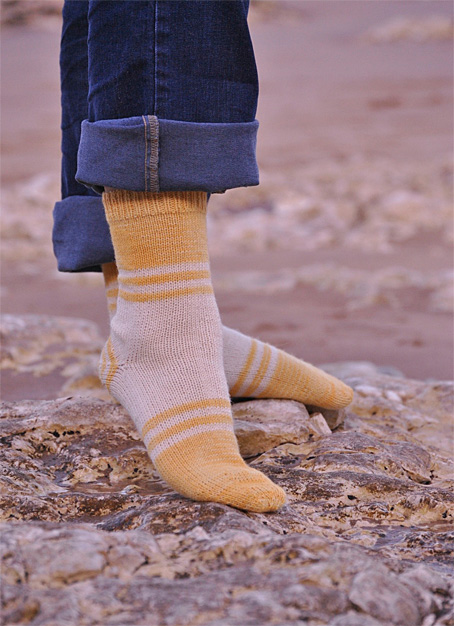
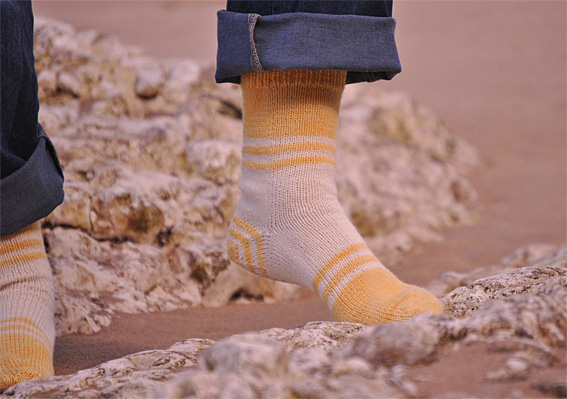
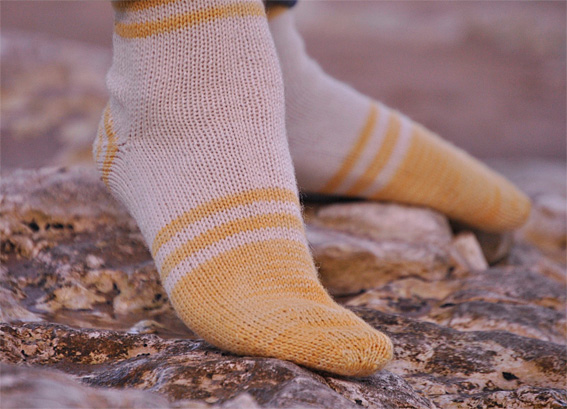
Another tricky colour for me although I love the semi-solid hand dyed yellow sock yarn that I bought a long time ago on Etsy. I cannot remember who the dyer was though as the label is lost. I didn’t have enough of the yarn left to knit the socks so combined it with a ball of 4 ply Diploma Gold in Ivory.
I love stripes. And thought it would be fun to integrate stripes into the pattern to get the fullest use out of the lovely hand dyed yellow yarn. Although yellow is not one of my favourite colours, I have always liked this sunny one.
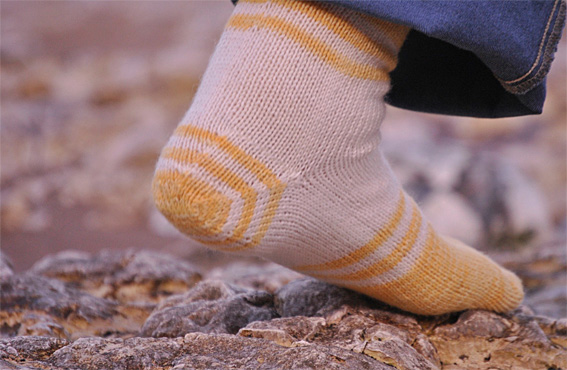
This sock starts with a knit 1 purl 1 rib for the cuff. I used an Afterthought 6 Section heel and a 6 Section Toe.
Yellow Rainbow Socks Pattern
Please note that the Yellow Rainbow Sock Pattern is a one size free pattern. The sock is knit from the cuff down to the toe. Without further ado, have fun with stripes!
Yarn
- 1 skein of Yellow Semi Solid hand-dyed 4 ply wool approx 50g. You may need more if you are knitting a longer leg.
- 1 ball of Diploma Gold 4 ply in Ivory 50g.
- Length of contrasting smooth yarn.
Needles
- 3.5mm double pointed needle (dpn) for casting on.
- 2.75mm set of five double pointed needles (dpns) for knitting sock.
Tension
The tension for this sock is 20 rows and 16 stitches / 5cm (2 inch) square in stocking stitch (stockinette). 8 stitches / 2.5cm (1 inch).
Abbreviations
double pointed needle(s) – dpn(s); stitch(es) – st(s); knit – k; purl – p; Wrong Side – ws; Right Side – rs; Wrap and Turn – w&t; knit 2 stitches together – k2tog; stocking stitch (stockinette stitch) – st st;
Mirror Images
I am going to mention the matter of balance in this sock design early on before you start knitting. I opted to have the leg and foot act like mirror images of each other so that there would be the same number of rows of ivory on either side of the row of waste yarn worked for the afterthought heel.
If you want to do the same you really will need to think about tension and the length of your foot before you start knitting the sock. That way you can make any small adjustments to the number of rows of solid yellow or ivory that you need for the foot before you start knitting the sock cuff and leg.
One of the problems with an afterthought heel is knowing how long to knit the foot before starting the toe. With this type of sock it isn’t possible to try on the sock for fit until you have finished the sock. Therefore, it becomes necessary to think about how many rows will be needed for knitting the foot and having some negative ease. A sock should be a bit smaller than your actual foot. This helps prevent the sock from moving around on your foot. I don’t use as much as 10%. But many sock knitters use anything between 10-15% negative ease for their socks. It is very much a matter of your own preference.
Length of the Foot and Negative Ease
To make sure that the sock will fit your foot, it helps to either measure your foot (the better option), or you can refer to a foot size chart. The Zappos ‘Measure Your Shoe Size‘ is helpful as it covers US, European and UK sizes.
Taking my foot as an example:
Metric Version
My foot measures 25cm. I don’t like as much as 10% negative ease in the length as my toes don’t like to be too restricted. So I subtract 1.25cm in length but if you prefer 10% you would subtract 2.5cm. This toe and heel will measure approximately 10cm.
- 25cm – 1.25cm = 23.75cm – 10cm = 13.75cm
Therefore, I will knit the foot until it measures 13.75cm from the ivory waste yarn. Then I will start knitting my toe.
Imperial Version
My foot measures 9 3/4 inches. I subtract 1/2 inch for negative ease. This toe and heel will measure approximately 4 inches.
- 9 3/4″ – 1/2″ = 9 1/4″ – 4″ = 5 1/4″
So I should knit the foot until it measures 5 1/4 inches from the ivory waste yarn. Then I will start knitting my toe.
If you know the length of your foot, you will be able to work out how many rows you should knit the foot of the sock, so that it will be the correct size for you. For me, I knew I needed to knit 55 rounds. The gauge is 4 rows / cm x 13.75cm = 55 rounds.
So the leg from the end of the cuff to the waste yarn for the heel has 21 rounds of yellow + 12 rounds of stripes + 22 rounds of ivory = 55 rounds (it is 21 3/4 but I rounded it up).
Therefore the foot from the waste yarn for the heel to the start of toe shaping has 22 rounds of ivory + 12 rounds of stripes + 21 rounds of yellow.
If you need fewer or greater number of rounds for your foot size, you may wish to adjust the number of yellow and ivory rounds in the leg so that they remain a mirror image.
Okay, maybe it is time for a tea break and a cookie while you work this out! Then onto the fun bit – knitting.
Cuff
- Using yellow hand dyed wool cast on 60 sts using 3.5mm dpn.
- Evenly divide sts onto four 2.75mm dpns. Take care not to twist the sts when ribbing the first round. 15 sts on each needle.
- Work 14 rounds of k1, p1 rib.
Leg
The yellow sock is knit using stocking stitch (stockinette stitch). When working stocking stitch in the round it means that you knit all the stitches until you are ready for the heel.
- Continuing with the yellow hand dyed wool k21 rounds.
Then begin the stripes:
- Rounds 22-24: Using ivory k3 rounds.
- Rounds 25-27: Using yellow k3 rounds.
- Repeat Rounds 22-27 once more.
How to do the Jogless Jog
When doing these repeating 3 round stripes use the jogless jog to hide the change of colour in the stripes. This is easy to do.
When ready to start the ivory yarn after knitting the 21st round of yellow wool:
- Using ivory k1 round
- At the start of the second round in ivory, pick up the yellow stitch below the first ivory stitch, k2tog.
- Knit the third round.
- Repeat this using the yellow wool for the next stripe.
- Note that where the jogless jog is done there will be 2 stitches across the 3 rounds. This is easily remedied (if you wish) by knitting one extra stitch each time before the jogless jog is worked.
After the 4th stripe change to ivory.
- k21 rounds.
- Then knit 45 stitches stopping 15 stitches before the centre back.
Afterthought Heel Set Up
This sock has an afterthought heel. Use a length of contrast yarn (about a metre). I chose pale blue yarn as a strong contrast to the ivory but not so dark that it might stain. It helps to use a smooth yarn as it is then easier to remove later when you’re doing the afterthought heel. Using the waste yarn knit the next 30 stitches.
Foot
- Round 1 of foot: Go back to where the ivory yarn was left. Knit across the 30 sts worked in the waste yarn and then continue the round.
- K21 more rounds. (22 rounds in total)
Then begin the stripes:
- Rounds 23-25: Using yellow k3 rounds.
- Rounds 26-28: Using ivory k3 rounds.
- Repeat Rounds 23-28 once more.
Finish knitting the foot:
- Change to yellow and k21 rounds.
6 Section Toe
Personally, I like to place the toe stitches evenly over 6 dpns with another for knitting with, but it is a little like working with a hedgehog, so not for everyone! Therefore, I am giving the instructions for working with 4 needles.
Spread the stitches equally over 3 needles, there will be 20 stitches on each needle.
- Round 1: (k8, k2tog) 6 times
- Rounds 2 & 3: k
- Round 4: (k7, k2tog) 6 times
- Rounds 5 & 6: k
- Round 7: (k6, k2tog) 6 times
- Rounds 8 & 9: k
- Round 10: (k5, k2tog) 6 times
- Rounds 11 & 12: k
- Round 13: (k4, k2tog) 6 times
- Rounds 14 & 15: k
- Round 16: (k3, k2tog) 6 times
- Rounds 17 & 18: k
- Round 19: (k2, k2tog) 6 times
- Rounds 20 & 21: k
- Round 22: (k1, k2tog) 6 times
Make sure that the 12 stitches are divided onto 2 needles with 6 stitches on each needle. It is important to make sure that these two needles are lying horizontally to the row of contrast yarn. Then graft the 12 sts. Sew in the loose end.
6 Section Afterthought Heel
For the afterthought heel pick up the live heel stitches onto 4 dpns. You will have 15 stitches on each needle. I start by cutting the end of the waste yarn where I am going to be working quite short then I pick up a live stitch on one side of the waste yarn and then the other. Then I unravel the waste yarn carefully. When the waste yarn gets a little bit too long, I cut it short again.
- Using ivory k3 rounds.
I decided to knit stripes for the heel. It isn\’t necessary to use the jogless jog for these as the shaping disguises the change in colour.
Spread the stitches equally over 3 needles, there will be 20 stitches on each needle.
- Round 1: (k8, k2tog) 6 times
- Rounds 2-4: k
- Round 5: (k7, k2tog) 6 times
- Rounds 6-8: k
- Round 9: (k6, k2tog) 6 times
- Rounds 10-12: k
- Round 13: (k5, k2tog) 6 times
- Rounds 14 & 15: k
- Round 16: (k4, k2tog) 6 times
- Rounds 17 & 18: k
- Round 19: (k3, k2tog) 6 times
- Rounds 20 & 21: k
- Round 22: (k2, k2tog) 6 times
- Round 23: k
Make sure that the 18 stitches are divided onto 2 needles with 9 stitches on each needle. It is important to make sure that these two needles are lying horizontally to the tip of the toe. Then graft the 18 sts.
Sew in all the loose ends and then wear with pride.
This heel is a very comfortable one to wear as it fits the heel snugly. I look forward to hearing about how you get on in the comments below.
Related Rainbow Sock Collection Links
The photographs were taken at White Rocks, Co Antrim, Northern Ireland


I have knitted close to 8 pairs of socks in the past year, and decided to finally try this afterthought heel. I know my foot well enough now that I can get the right number of cuff stitches and tweak the foot length to just right. However, this heel is so snug, and I even needed to add a few “fluff” rows of just knit stitches here and there to make it even fit around my heel and close. (Granted, this might be the yarn- I’m using your Jawoll Magic Stripe sock pattern with the appropriate yarn and it’s a tidge more “rustic” than I’ve used before with seemingly less stretch or give. I do like the fuzz and slightly varying thickness for the most part, and the colors are swoon-worthy!)
I’m brainstorming that maybe adding another stitch or two while casting on might give the little extra “breathing room” I feel like I want? I cast on 64 usually, so I might try 68 or 72 next time, hopefully without sacrificing a well-fitting cuff. Do you have any recommendations to help an afterthought heel like this fit less tight? Love your blog- its virtually the only sock source I use!
I’d cast on your normal 64 stitches and then increase a few stitches on either side before you start the afterthought heel. This will give you some extra space in the heel area. I find that the afterthought heels and the Fish Lips Kiss Heel are very shallow fitting heels and I find that they can pull across the instep if you don’t cast on the extra stitches. Work the heel over the larger number of stitches. After knitting the heel, you can decrease the same stitches. It creates a small gusset either side but helps the fit of the heel. You can always, do a practice heel buy knitting a short section of leg and knitting the heel and then try on and see if you need to tweak the fit. If you don’t cut the yarn you can unravel the heel and then cast on your sock as normal. No yarn wasted.