The Orange Rainbow Socks are the third post in the Rainbow Socks Collection Series following on from ‘What is the Perfect Basic Sock Pattern?‘. The collection came about after my search during the summer for the perfect basic sock pattern.
Do you love the colour orange?
Every so often it is good to stretch yourself and try using one of your less favourite colours. Orange isn’t one of my favourite colours Although, having said that, these socks are wonderfully autumnal!
So, what do you do to make using a colour that isn’t a favourite easier to work with?
Design Choices
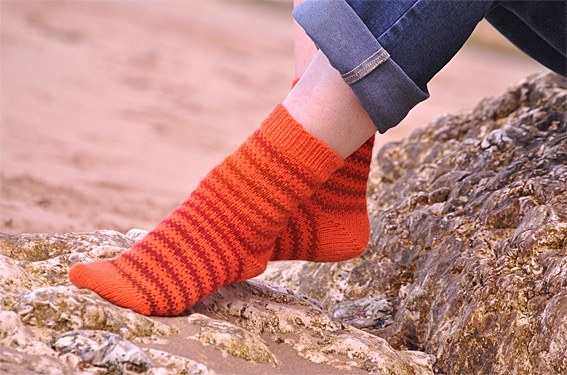
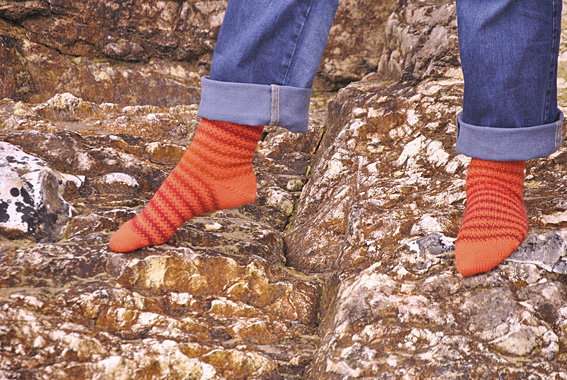
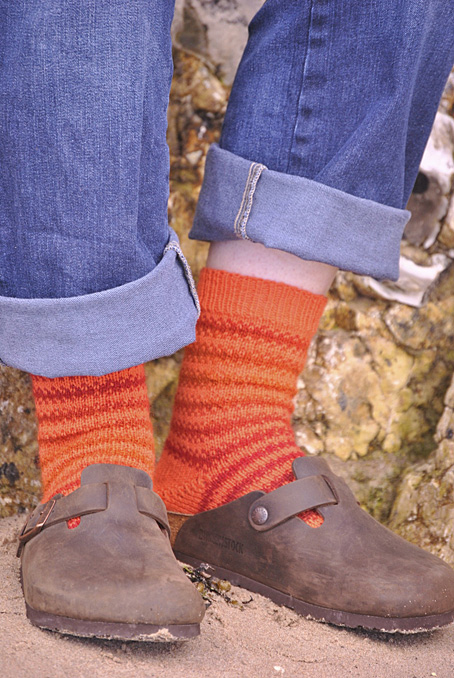
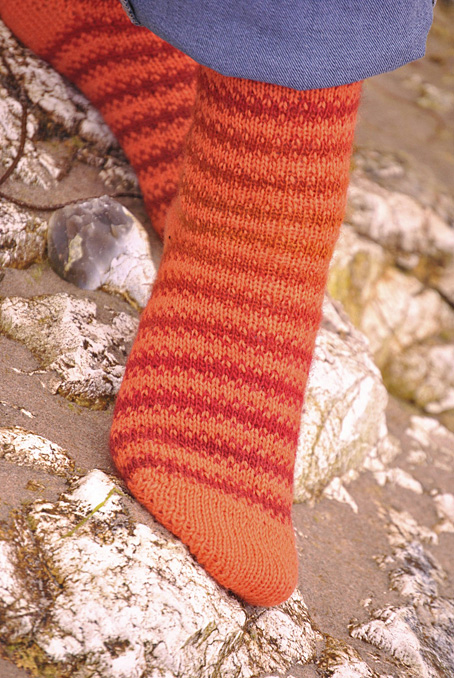
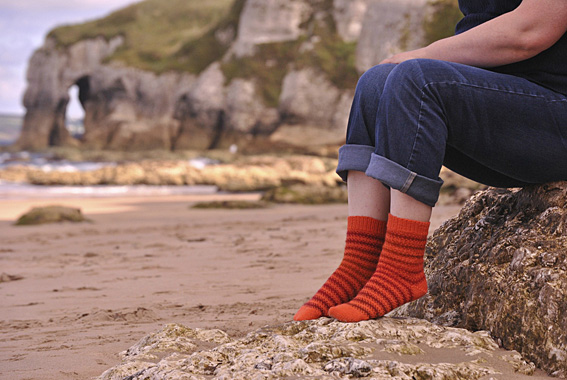
I softened the look of the Opal Orange by combining it with a ball of Zauberball Burnt Almonds in a simple fair isle stripe. The colour combination is perfect for Autumn.
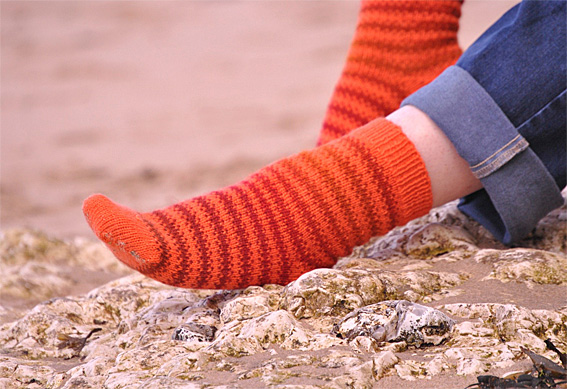
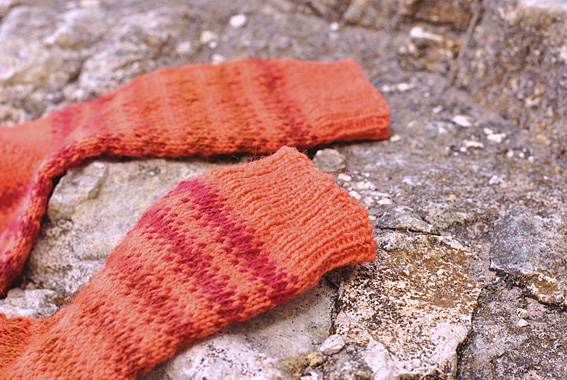
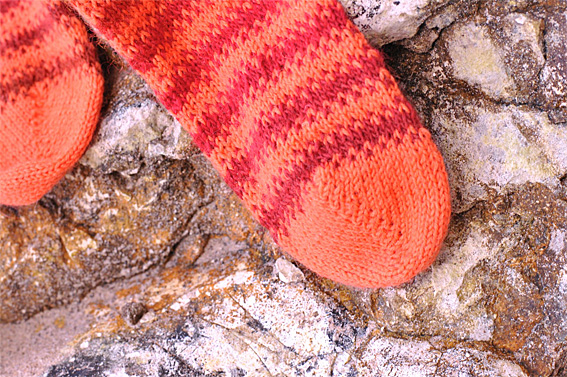
As this is the Orange Rainbow Sock, I chose to knit the cuff, heel and toe using the orange yarn.
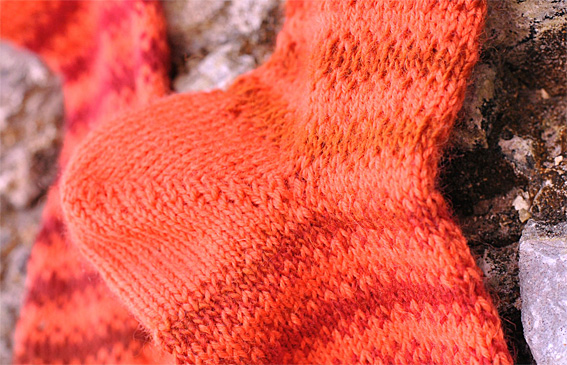
The cuff is a knit 1, purl 1 rib. I used a no wrap short row heel and tweaked the heel to create a no wrap short row toe.
- Will the heel and toe choice work well with the fair isle stripes?
I wanted to have a good balance between the striped leg and foot sections with the cuff, heel and toe.
Fair Isle Peerie
I love striped fair isle socks. They are so warm for the colder weather with the extra strands of yarn being carried on the inside. It is important to leave these reasonably loose when knitting the peerie.
With this sock I wanted to use a small peerie design which helps allow the sock to retain its stretch. The stocking stitch stripes between the peerie pattern rows help with this as well.
With a fair isle striped sock an important design issue is keeping the flow of the pattern. Using a short row heel is an excellent choice for doing this.
Orange Rainbow Sock Pattern
Please note that the Orange Rainbow Sock Pattern is a one size free pattern. Although, this is the case, it would be relatively easy to adapt this sock to a larger size so long as you increase by 4 stitch units up or down. This sock is knit from the cuff down. I shall also mention at this point that the toe does involve some kitchener stitch to finish. The sock is finished by grafting the toe stitches to the foot stitches across the top of the foot.
Yarn
- 1 ball of Opal Uni Orange
- 1 ball of Zauberball Burnt Almonds
Needles
- 3.5mm double pointed needle (dpn) for casting on.
- 2.75mm set of five double pointed needles (dpns) for knitting sock.
Tension
The tension for this sock is 20 rows and 16sts / 5cm (2 inch) square in the fair isle pattern. 8 stitches / 2.5cm (1 inch). As knitters all knit fair isle at a different tension, it would be advisable to knit a swatch. Note, also that your tension in fair isle can change from knitting flat to knitting in the round. You may need to use a smaller or larger needle to obtain the correct tension.
Abbreviations
double pointed needle(s) – dpn(s); stitch(es) – st(s); knit – k; purl – p; slip 1 – sl 1; pass slipped stitch over – psso; Wrong Side – ws; Right Side – rs; knit 2 stitches together – k2tog; slip 1 pick up and knit 1 stitch in the gap before the next stitch – psso – HTR 2 & TTR 2; slip 1 pick up loop in the gap before the next stitch, purl the slip stitch and the loop together – HTR 1 & TTR 1;
Cuff
- Cast on 60 sts using 3.5mm dpn and the orange yarn.
- Evenly divide sts onto four 2.75mm dpns. Take care not to twist the stitches when ribbing the first round. 15 sts on each needle.
- Work 16 rounds in k1, p1 rib.
Leg
For this sock I shall give written instructions and a chart, although I find a chart easier to follow for these types of simple two colour patterns.
- The two colour pattern is a very easy one repeating over 2 stitches and 8 rows.
- In a pattern like this it is essential to decide which yarn will be carried below and which above on the wrong side. If this is not worked consistently you will find that the fabric on the front will not look even. This is known as Yarn Dominance which is clearly explained in a recent Daily Knitting post by Kathleen Cubley.
- Rounds 1 & 2 (Orange): k
- Round 3: Using contrast colour k1, using orange k1; Repeat these 2 sts to end of round.
- Round 4: Using orange k1, using contrast colour k1; Repeat these 2 sts to end of round.
- Rounds 5 & 6 (Contrast): k
- Round 7: Same as Round 4
- Round 8: Same as Round 3
Repeat the chart or the instructions a total of 6 times.
- After finishing the 6th repeat
- Knit round 1 of the pattern, then knit needle 1, turn.
No Wrap Short Row Heel
You are ready to start the no wrap short row heel using the Opal orange sock yarn. The original version of this heel that I used can be found in The Big Book of Socks by Kathleen Taylor. I added extra short rows to the heel as I found the heel a bit too shallow on my heel when I was wearing it.
This is a very easy heel to knit. It fits snugly around the heel. But it does have little gaps along the diagonal heel line. I don’t really mind them but I know some people do.
This heel is worked over half of the total stitches cast on for the sock – 30 stitches.
- Row 1: sl 1, p28, turn
- Row 2: sl 1, k27, turn
- Row 3: sl 1, p26, turn
- Row 4: sl 1, k25, turn
- Row 5: sl 1, p24, turn
- Row 6: sl 1, k23, turn
- Row 7: sl 1, p22, turn
- Row 8: sl 1, k21, turn
- Row 9: sl 1, p20, turn
- Row 10: sl 1, k19, turn
- Row 11: sl 1, p18, turn
- Row 12: sl 1, k17, turn
- Row 13: sl 1, p16, turn
- Row 14: sl 1, k15, turn
- Row 15: sl 1, p14, turn
- Row 16: sl 1, k13, turn
- Row 17: sl 1, p12, turn
- Row 18: sl 1, k11, turn
- Row 19: sl 1, p10, turn
- Row 20: sl 1, k9, turn
- Heel Turn Row 1: sl 1, p8, sl 1, pick up loop in the gap before the next st, p the sl st and the loop together (HTR 1), turn
- Heel Turn Row 2: sl 1, k8, sl 1, pick up and k1 st in the gap before the next st, psso (HTR 2), turn
- Heel Turn Row 3: sl 1, p9, HTR 1, turn
- Heel Turn Row 4: sl 1, k10, HTR 2, turn
- Heel Turn Row 5: sl 1, p11, HTR 1, turn
- Heel Turn Row 6: sl 1, k12, HTR 2, turn
- Heel Turn Row 7: sl 1, p13, HTR 1, turn
- Heel Turn Row 8: sl 1, k14, HTR 2, turn
- Heel Turn Row 9: sl 1, p15, HTR 1, turn
- Heel Turn Row 10: sl 1, k16, HTR 2, turn
- Heel Turn Row 11: sl 1, p17, HTR 1, turn
- Heel Turn Row 12: sl 1, k18, HTR 2, turn
- Heel Turn Row 13: sl 1, p19, HTR 1, turn
- Heel Turn Row 14: sl 1, k20, HTR 2, turn
- Heel Turn Row 15: sl 1, p21, HTR 1, turn
- Heel Turn Row 16: sl 1, k22, HTR 2, turn
- Heel Turn Row 17: sl 1, p23, HTR 1, turn
- Heel Turn Row 18: sl 1, k24, HTR 2, turn
- Heel Turn Row 19: sl 1, p25, HTR1, turn
- Heel Turn Row 20: sl 1, k26, HTR 2, turn
- Heel Turn Row 21: sl 1, p27, picking up the loop in gap between the instep and heel sts, work as HTR 1, turn
- Heel Turn Row 22: sl 1, k14, begin new round in centre of heel. K14, sl 1, picking up the loop in the gap between the instep sts and heel sts, work as HTR 2.
Foot
It is advisable when knitting the foot section to try the sock on a couple of times to decide how long you want the foot to be. It is better if the pattern ends with one of the Burnt Almond rounds.
- Continue with the 2 colour pattern used for the leg, starting with round 2 of the pattern.
- Work a total of 7 repeats of the pattern for the foot.
- After finishing the 7th repeat, cut the contrast yarn, the toe is worked using orange.
- Knit round 1 of the pattern, then knit needle 1, turn.
No Wrap Short Row Toe
I adapted the No Wrap Short Row Heel to work a No Wrap Short Row Toe to match it. This toe involves grafting the stitches to the instep stitches at the end.
- Row 1: sl 1, p28, turn
- Row 2: sl 1, k27, turn
- Row 3: sl 1, p26, turn
- Row 4: sl 1, k25, turn
- Row 5: sl 1, p24, turn
- Row 6: sl 1, k23, turn
- Row 7: sl 1, p22, turn
- Row 8: sl 1, k21, turn
- Row 9: sl 1, p20, turn
- Row 10: sl 1, k19, turn
- Row 11: sl 1, p18, turn
- Row 12: sl 1, k17, turn
- Row 13: sl 1, p16, turn
- Row 14: sl 1, k15, turn
- Row 15: sl 1, p14, turn
- Row 16: sl 1, k13, turn
- Row 17: sl 1, p12, turn
- Row 18: sl 1, k11, turn
- Toe Turn Row 1: sl 1, p10, sl 1, pick up loop in the gap before the next st, p the sl st and the loop together (TTR 1), turn
- Toe Turn Row 2: sl 1, k10, sl 1, pick up and k1 st in the gap before the next st, psso (TTR 2), turn
- Toe Turn Row 3: sl 1, p11, TTR 1, turn
- Toe Turn Row 4: sl 1, k12, TTR 2, turn
- Toe Turn Row 5: sl 1, p13, TTR 1, turn
- Toe Turn Row 6: sl 1, k14, TTR 2, turn
- Toe Turn Row 7: sl 1, p15, TTR 1, turn
- Toe Turn Row 8: sl 1, k16, TTR 2, turn
- Toe Turn Row 9: sl 1, p17, TTR 1, turn
- Toe Turn Row 10: sl 1, k18, TTR 2, turn
- Toe Turn Row 11: sl 1, p19, TTR 1, turn
- Toe Turn Row 12: sl 1, k20, TTR 2, turn
- Toe Turn Row 13: sl 1, p21, TTR 1, turn
- Toe Turn Row 14: sl 1, k22, TTR 2, turn
- Toe Turn Row 15: sl 1, p23, TTR 1, turn
- Toe Turn Row 16: sl 1, k24, TTR 2, turn
- Toe Turn Row 17: sl 1, p25, TTR1, turn
- Toe Turn Row 18: sl 1, k26, TTR 2, turn
- Toe Turn Row 19: sl 1, p27, picking up the loop in gap between the instep and toe sts, work as TTR 1, turn
- Toe Turn Row 20: sl 1, k28, sl 1, picking up the loop in the gap between the instep sts and toe sts, work as TTR 2.
The no wrap short row toe is wonderful. It is a neat fit around the toes and still leaves a little bit of wiggle room. You do also get the little ‘holes’ along the edge of the toe but they are better than the slight ladder you get along the edge of some toes.
Finishing
Finish the toe by grafting the toe sts to the instep sts using kitchener stitch. I explained how to work kitchener stitch in Part 4 of How to Knit Your First Sock.
Weave in all loose ends.
I washed and blocked the socks because I was going to be photographing them but it really isn’t necessary with these socks.
They have proved to be very comfortable to wear and I have found myself reaching for them as soon as they are dry to put on again, even though they are orange and don’t really go with anything in my wardrobe!
Related Rainbow Sock Collection Links
The photographs were taken at White Rocks, Co Antrim, Northern Ireland



I'd love to hear from you. Let me know what you think...